Setup guide
Seven illustrated steps, no tools, about twenty minutes for one person. The same drawings as the manual in the box, with one check added at the top because it is the only thing people get wrong.
Before you start: the net fits one way
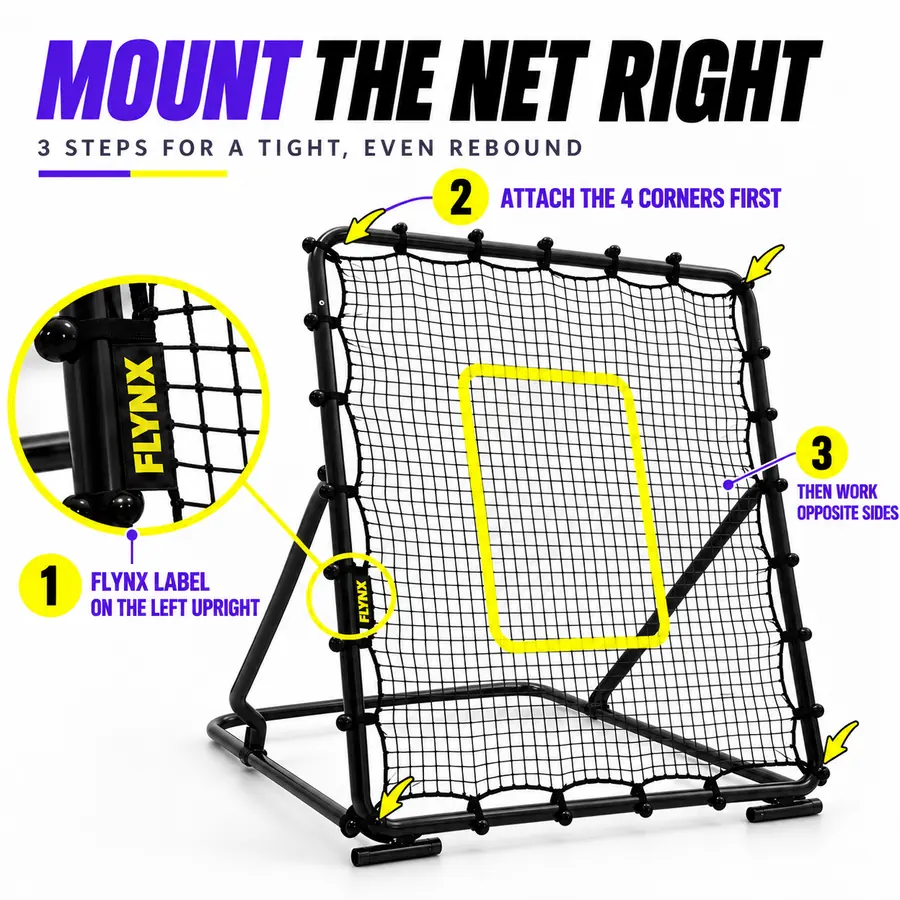
The yellow FLYNX label goes on the left upright. The net is not square: one pair of edges is longer than the other. Stand in front of the rebounder and hold the net against the front frame with the label on the left-hand upright before you hook the first bungee. The mesh then reaches all four corners and the target square sits in the middle.
Then attach the four corners first, and work opposite sides. Corners first sets the net square; going side to opposite side keeps the tension even, for a tight, even rebound.
If the mesh comes up short on one side, the net is turned the wrong way. Unhook it and turn it until the label sits on the left upright. Never stretch it to make it reach: fitted the right way round it covers the whole opening with nothing to pull.
Questions or a missing part: support@flynx-sport.com. Write to us before starting an Amazon return; most things are solved in one email.
What's in the box
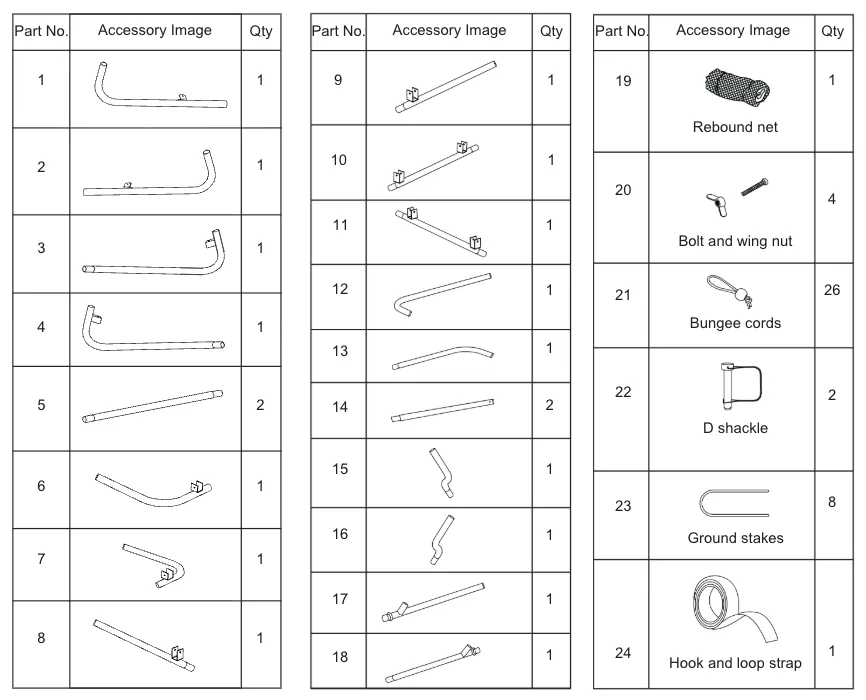
24 numbered parts: 18 tubes, the net, 4 bolts with wing nuts, 26 bungee cords, 2 D-shackles, 8 ground stakes and a hook-and-loop strap, plus the Stars and Stripes cover and the manual. Lay everything out and check the numbers against the drawing before you begin.
Assembly in seven steps
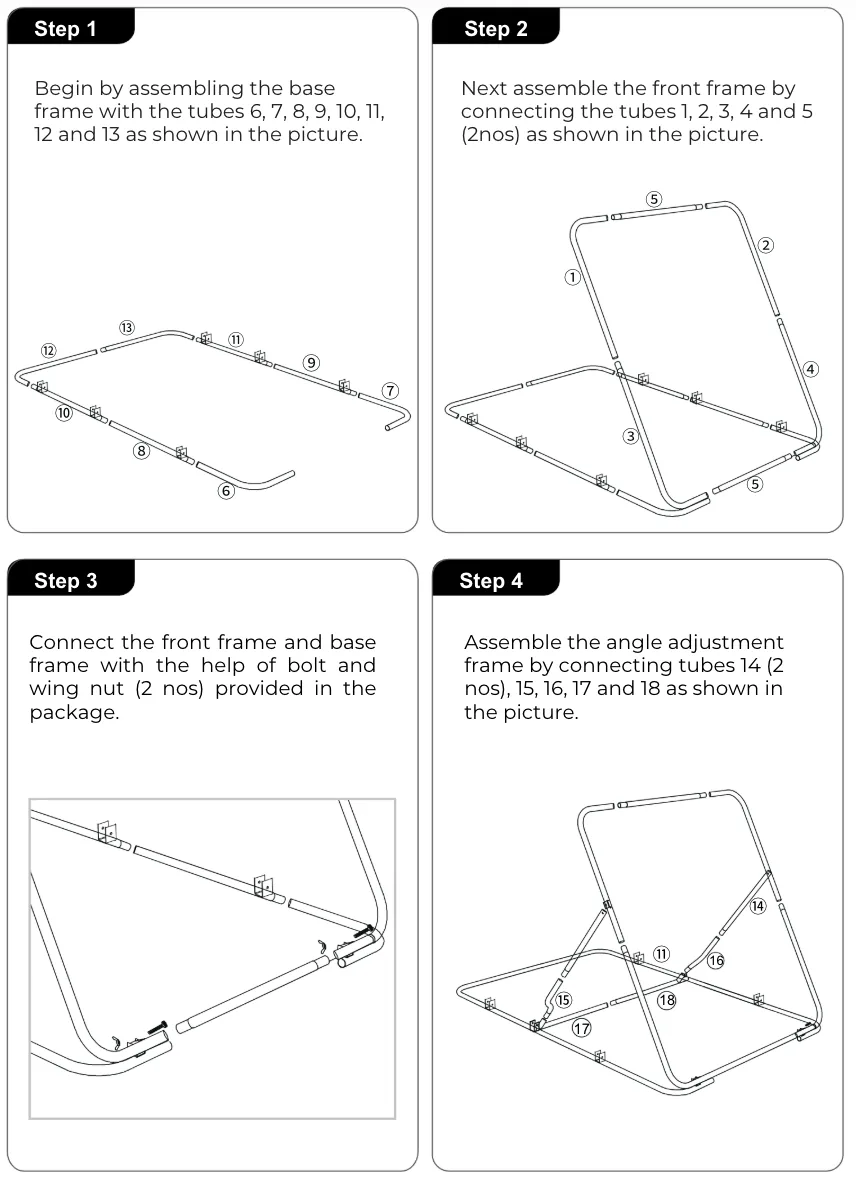
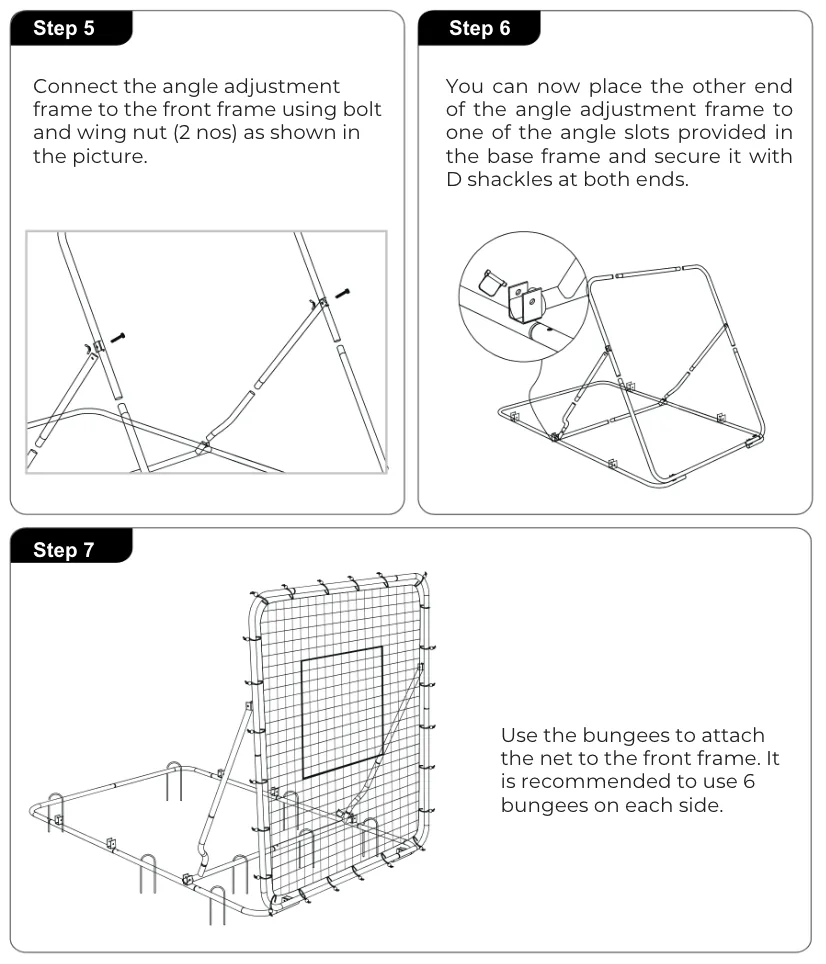
Hand-tighten every wing nut; your hands are the only tools you need. Build it where you will use it, or carry it there before you fit the net.
- Base frame. Assemble the base frame with tubes 6, 7, 8, 9, 10, 11, 12 and 13, as drawn.
- Front frame. Connect tubes 1, 2, 3, 4 and the two tubes 5 into the front frame.
- Join them. Connect the front frame to the base frame with two of the bolts and wing nuts.
- Angle frame. Assemble the angle adjustment frame from the two tubes 14 and tubes 15, 16, 17 and 18.
- Attach it. Connect the angle frame to the front frame with the other two bolts and wing nuts.
- Lock the angle. Put the free end of the angle frame into one of the angle slots in the base frame and secure it with the D-shackles at both ends.
- Fit the net. Place it with the FLYNX label on the left upright, hook the four corners first, then work opposite sides with the bungees, six on each side, so the tension stays even.
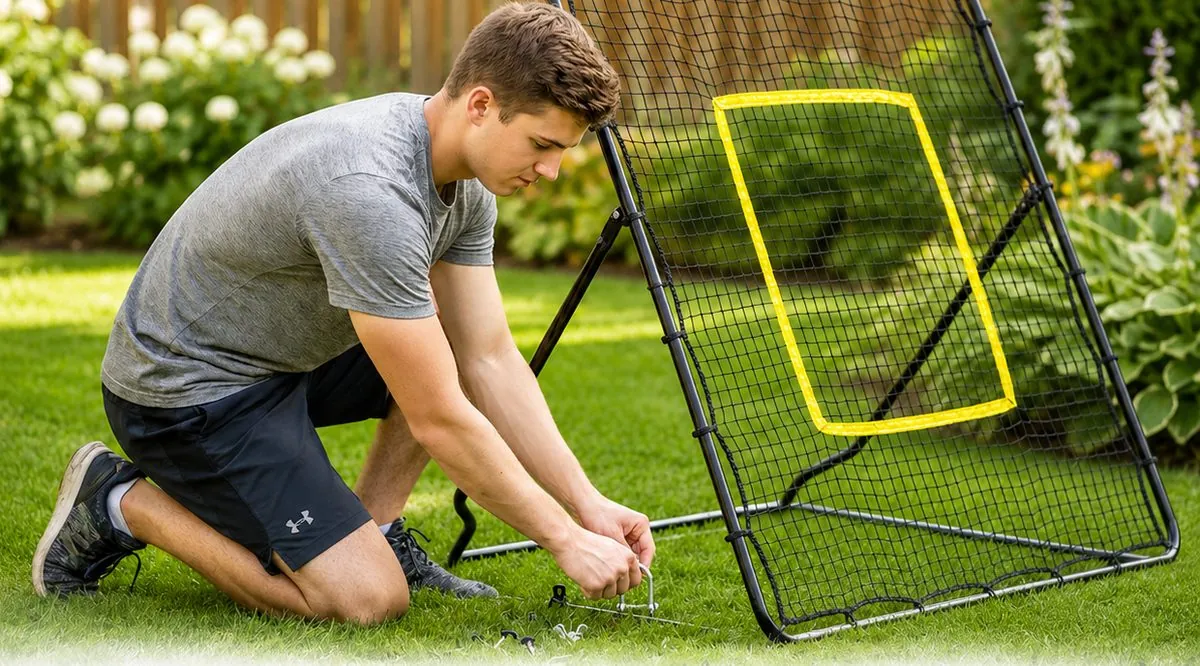
Ground stakes are in the box for slippery ground or hard throwing. On grass the frame stands on its own; if it walks during a session, push the stakes through the base tubes. On turf or packed dirt, see the anchoring guide.
Set the angle
Three slots in the base, three kinds of ball. Move the free end of the angle frame to the slot you want and lock it with the D-shackles. Switching takes seconds.
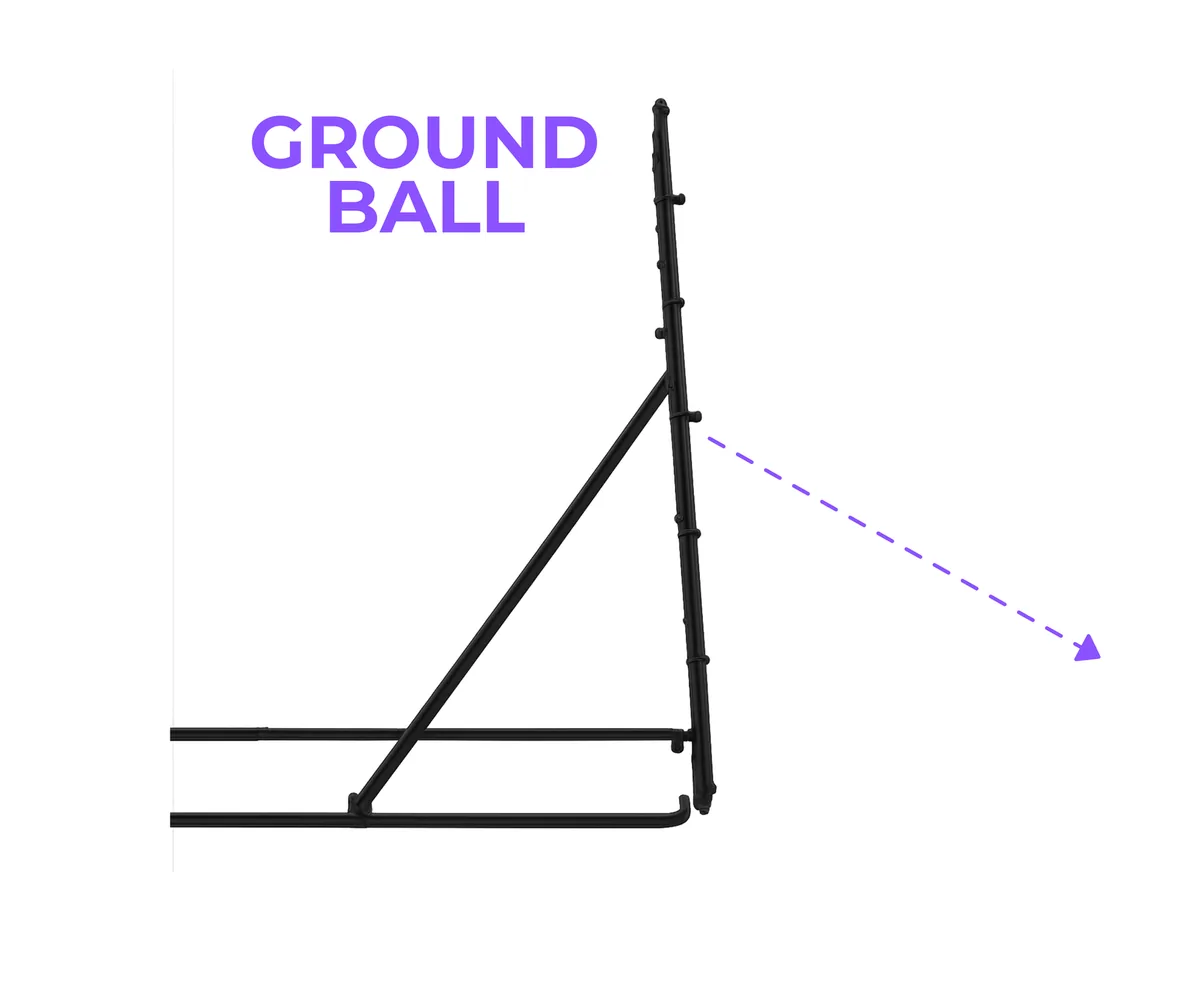
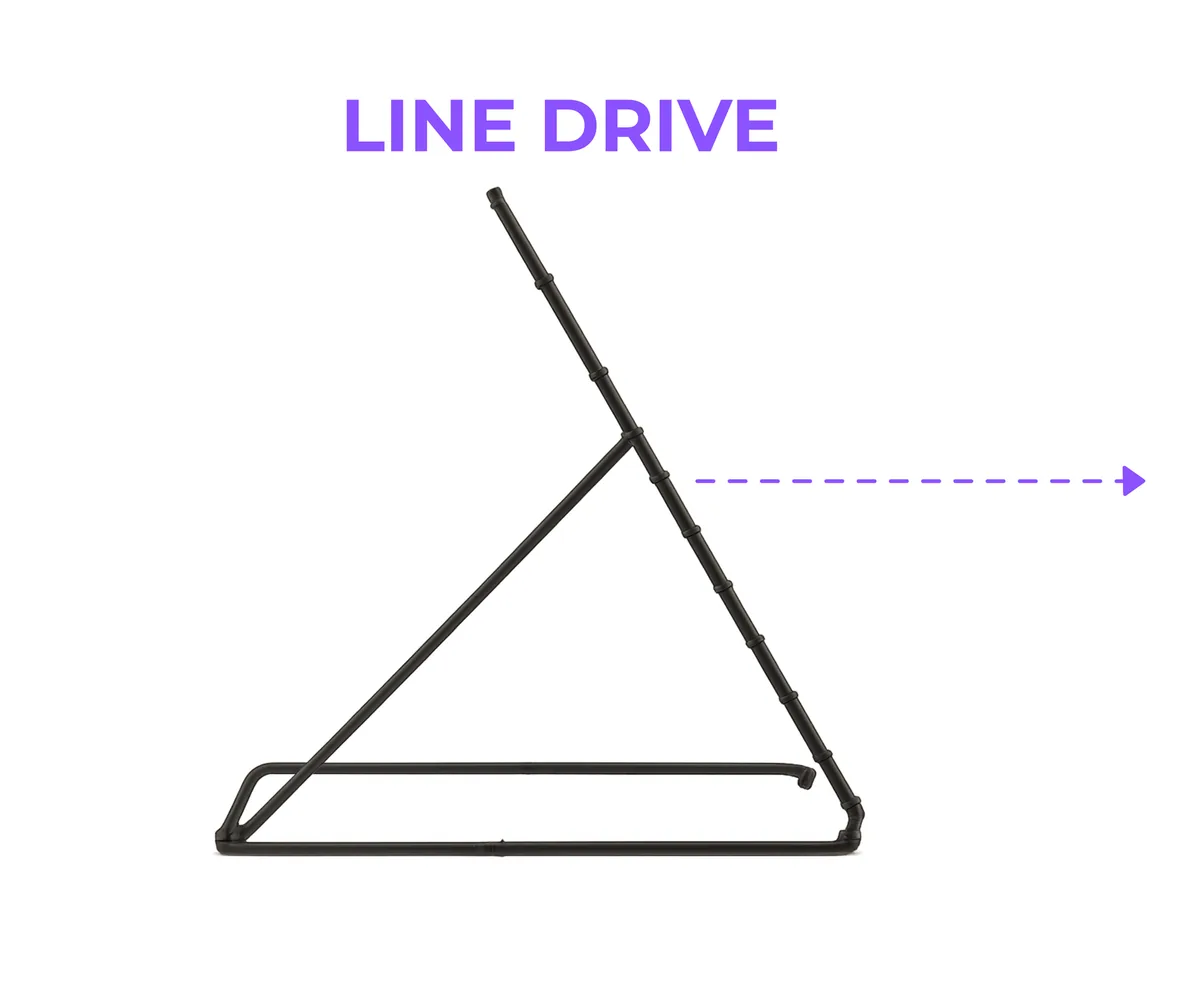
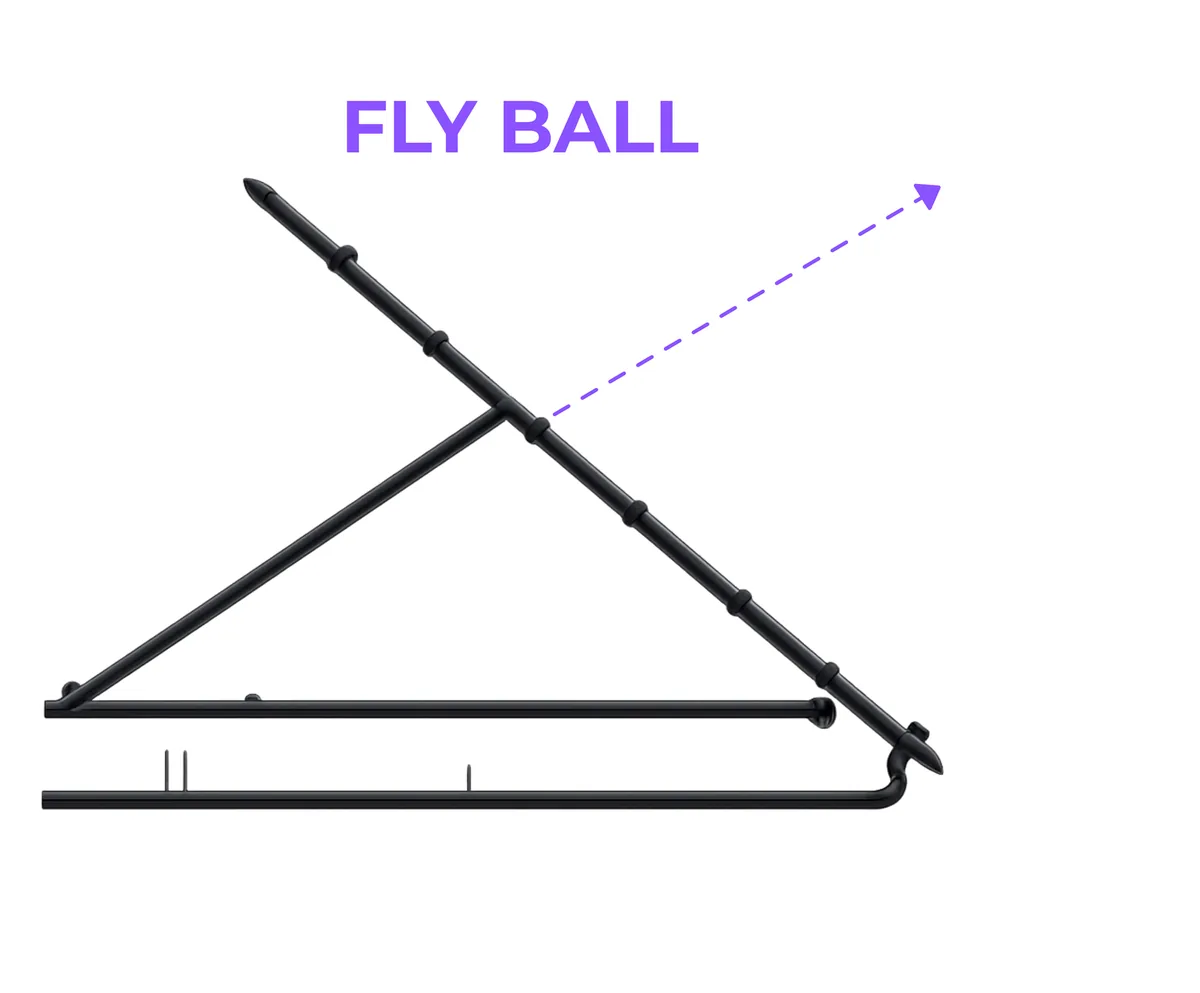
More on what each angle is for, with distances by age, on the angles page and in the drills.
Fit the cover
The cover is what lets the rebounder live in the yard between sessions: waterproof 210D polyester, cut to the frame.
- Place the printed side (flag and logo) against the front of the net.
- The top edge is sewn to stay in place.
- Wrap it around the frame.
- Close the Velcro straps at the back. The central adjustment bar is left free; nothing needs taking apart.
On a windy day take the cover off and fold the frame flat. More in leaving a rebounder outside.
Before every session
- Look over the net, the bungees and the frame. Do not use it with a frayed cord, a bent tube or a cracked joint.
- Retighten the wing nuts by hand.
- Wear a batting helmet: the ball comes back fast and at angles you do not expect. A face guard is a good idea for younger players.
- One player at the net at a time, bystanders clear of the return. Adult supervision under 18.
- Not in high wind or a storm, not on a slope, not on sand or uneven paving. Regular balls only: no weighted, dimpled or industrial training balls.
Care through the season
Between sessions
Wipe the frame and net with a damp cloth when they are dirty, and put the cover on.
Monthly
Press the net: the tension should feel even across the face. Re-hook any bungee that has slipped and replace one that has lost its stretch. Check the stakes and the D-shackles.
Winter
Take the net off, brush it clean, let it dry fully, fold the frame flat and store both indoors, dry, away from heaters and direct sun. Reassemble in spring in the same twenty minutes.
If something is not right
- The net looks too small for the frame. It is turned the wrong way: unhook it, quarter turn, hook it again (see the check at the top).
- The net feels loose. Tighten the bungees or replace a tired one.
- The frame shifts during use. Push the ground stakes in, or move to ground with more grip.
- The ball comes back unevenly. Check the net tension corner to corner and that the angle frame is seated in its slot on both sides.
- Wing nuts loosen. Retighten before each session.
- A part is missing or broken. Email support@flynx-sport.com with your order number. Within the first year a defect is replaced or refunded through Amazon; see the warranty page.